
Manage Cameras
Camera Module Overview
The PSTracker Camera Module allow agencies to manage their Body Worn & other type Cameras.
Manage => Cameras

Navigate to Manage => Cameras to view your list of cameras

Manage Cameras Sub-menu

At the top right of the management page is the cameras sub-menu.
-
- Add Cameras - Used to create a new Camera.
- Cameras - Brings you to the list of Cameras.
- Makes - Manage the Makes of Cameras.
- Models - Manage the Models of Cameras.
- Maint (Maintenance) Types - The types of maintenance performed on your Cameras.
- Funding - Manage the Funding Types. (agency wide setting)
- Vendors - Agency's Vendors - See System Options & Settings - Vendors.
- Visibility - Adjust visible columns - See System Options & Settings - Column Visibility.
View - Edit A Camera
To view a camera, click the View button for the specific camera.

This brings you to the Camera Details.
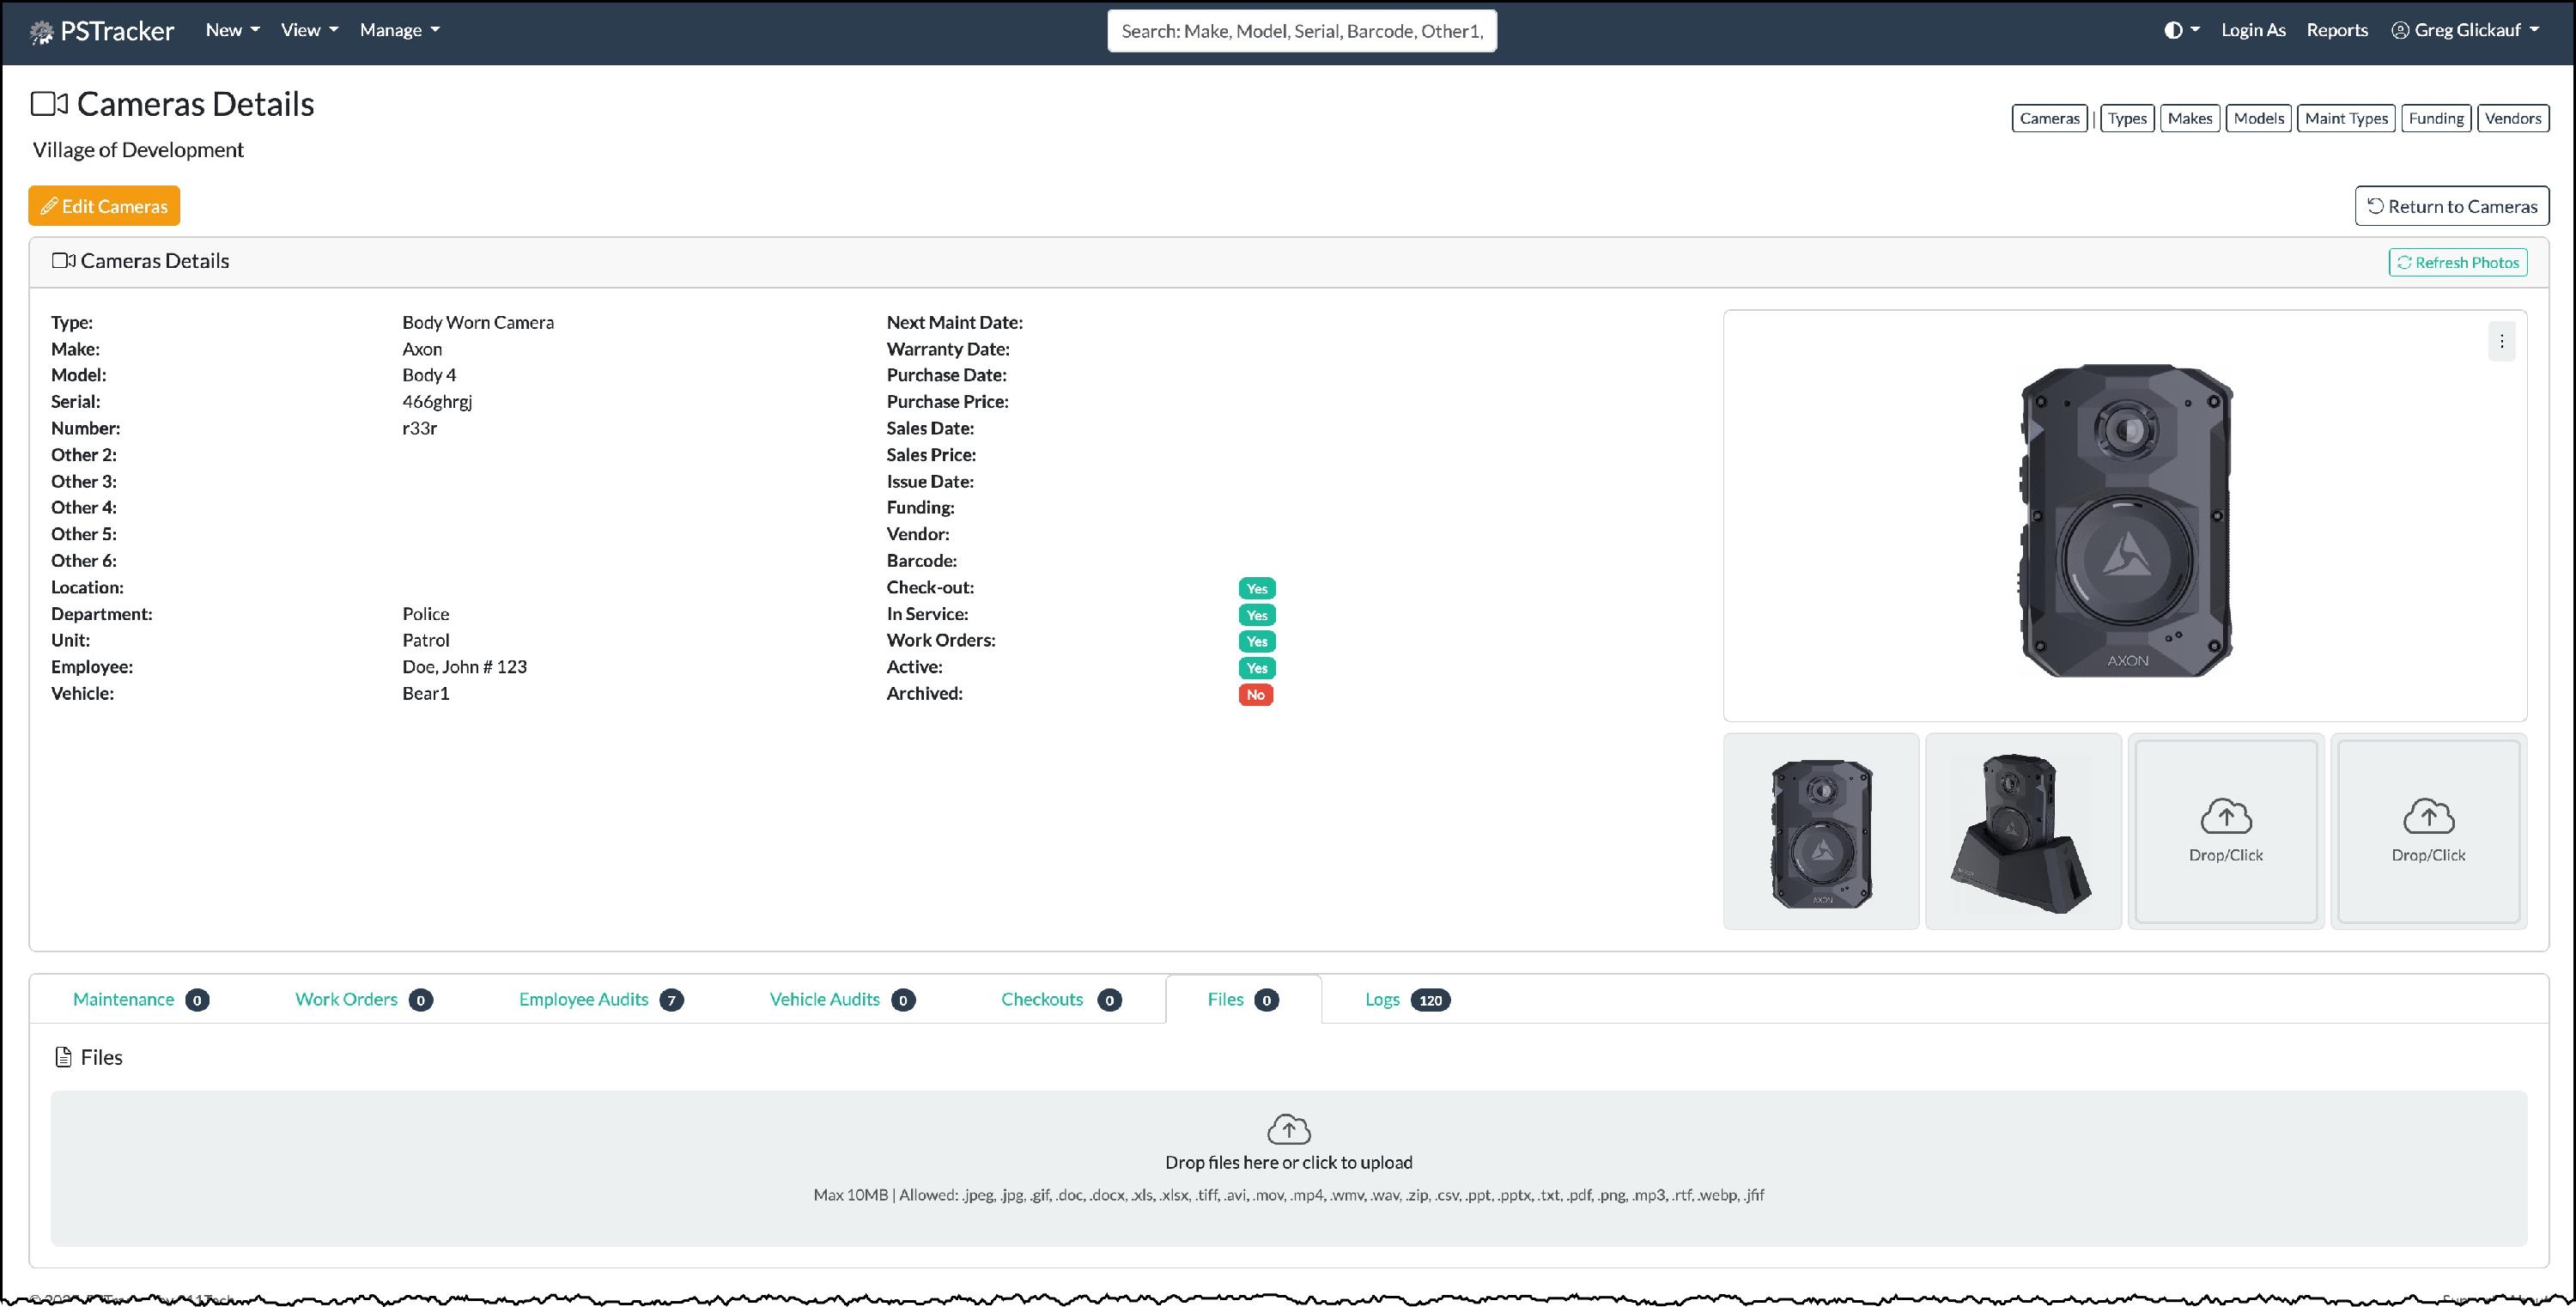
The Camera Details page displays the specific details of the selected Camera, and optionally up to four photos of the Camera. There are several tabs at the bottom allowing you to view and/or manage details such as:
- Maintenance
- Work Orders
- Employee Audits
- Vehicle Audits
- Checkouts
- Files
- Logs
Maintenance

To add a maintenance entry for this Camera, click the Add Maintenance button at the top right of the maintenance list. A window opens allowing you to create a maintenance entry for the specific Camera.
If you are a Camera Manager, you will also see Edit links at the far right of each maintenance entry. Clicking the Edit link allows you to edit a specific maintenance entry.
Work Orders
A list of the work orders associated with this specific Camera. Click on a work order number view the details.
Employee Audits
If your agency uses the Employee Audit Module, this tab will show the audits this camera was a part of.
Vehicle Audits
If your agency uses the Vehicle Audit Module, this tab will show the audits this camera was a part of.
Checkouts
If your agency uses the Checkout Module, this will show the checkout history for this camera.
Files
Adding files to an Camera is a great way to scan in and attach paper documents such as receipts, purchase orders, or even photos to store and associate with this Camera.

If your agency allows file uploads and your user account has the File Upload group permission, you will see a dropzone area. Drag & Drop your files over this area.
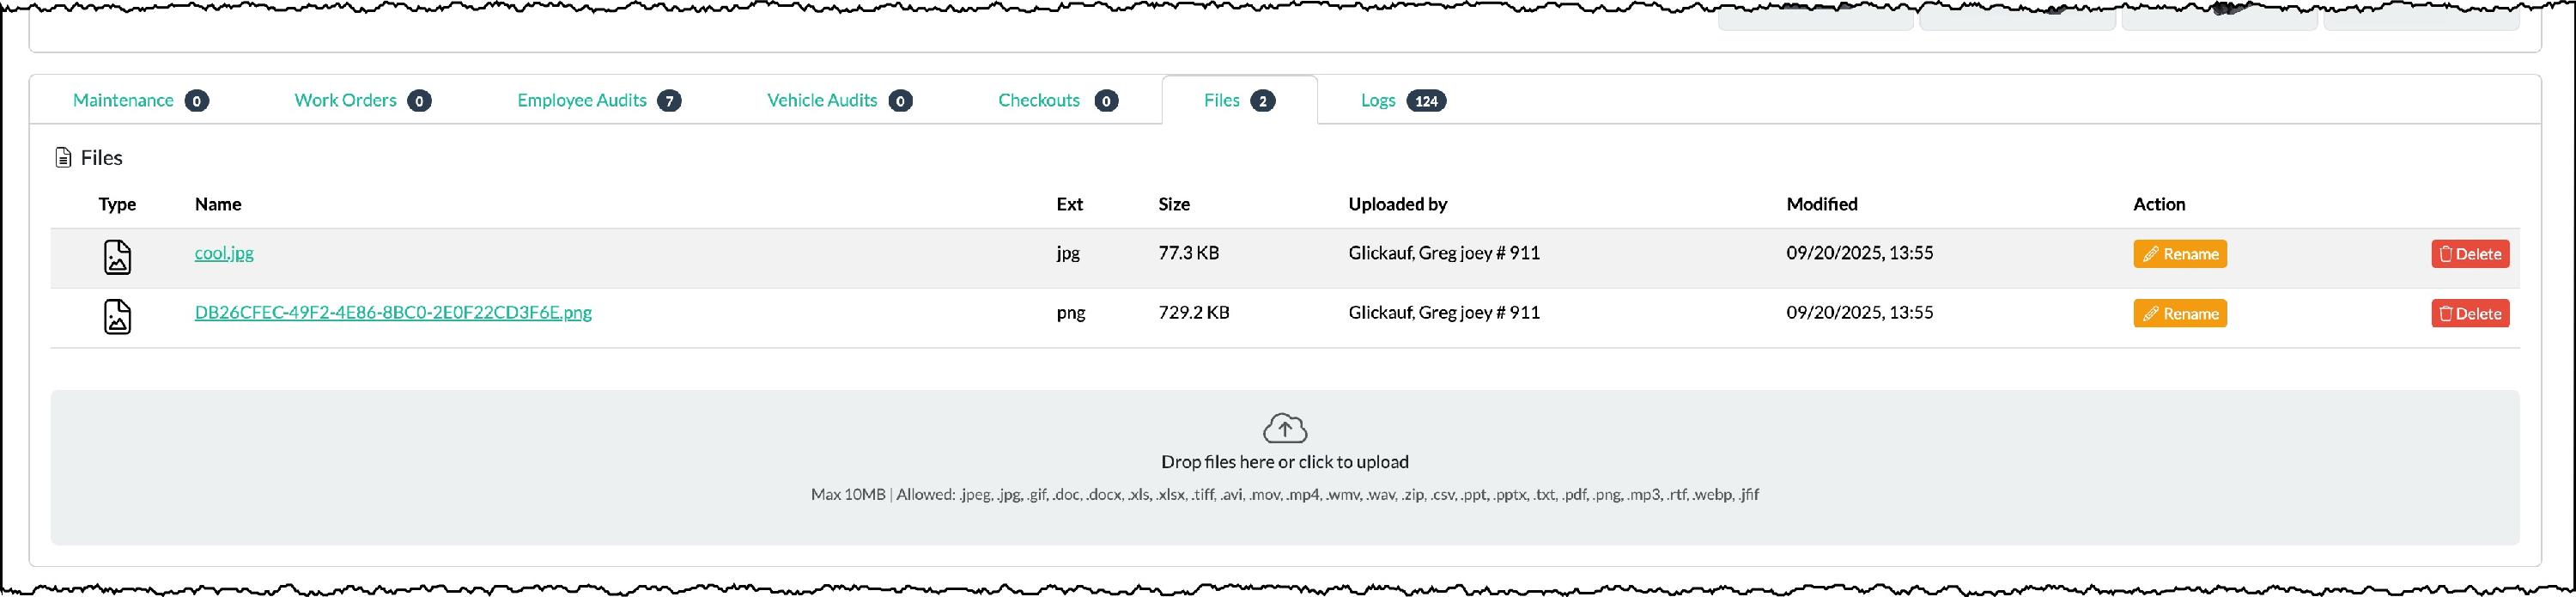
If you have the File Upload group permission, you will also see the Rename and Delete File links at the far right of each file entry. Clicking the Rename link allows you to rename that specific file. Clicking the Delete link permanently removes that specific file.
Add Camera
To add a new Camera, at the top right click Add Camera.

This will open a modal allowing you to add a new Camera.

Fill in the fields as appropriate.
Explanation of Camera fields:
- Make - The Cameras Make (e.g. Dell, Panasonic).
- Model - The Cameras Model.
- Serial - The Cameras serial number.
- Unit (Optional) - This Camera can be tied to a specific unit.
- Location - Where the Camera is physically located.
- Number - You own in-house numbering system for this Camera.
- Vendor - The vendor for this Camera
- Department - Generally Police (unless your agency uses the multi-department feature)
- Funding (Optional) - The funding source.
- Issue Date - Date this Camera was issued to the field.
- Purchase Date - Date this Camera was purchased.
- Purchase Price - Cost of this Camera.
- Sales Date - Date this Camera was sold.
- Sales Price - Amount this Camera was sold for.
- Next Maintenance Date - Date you wish to perform the next maintenance.
- Note: Emails will be sent to selected personnel notifying that maintenance is upcoming at 30, 15, 7, the day of and 30 days overdue. These are dates are created during setup but can be modified by PSTracker Support.
- Warranty Date - Date of warranty expiration for this Camera.
- Note: Emails will be sent to selected personnel notifying that warranty expiration is upcoming at 30, 15, 7, the day of and 30 days overdue. These are dates are created during setup but can be modified by PSTracker Support.
- Notes - Administrative notes to assist in managing this Camera.
- Checkout - Can this Camera be checked out within the checkout module.
- In-Service - Is this Camera in service.
- Show in Work Order List - Is this Camera in the Work Order select list.
- Active - The status of this Camera. Active means the Camera is currently in use.
- Archive - This means the Camera is no longer in use. You archive an Camera rather than delete a Camera so that you will always have a historical record of this Camera.
- Vehicle - The vehicle this Camera is assigned to.
- Employee - The employee this Camera is assigned to.
Edit Camera
To edit a camera:
If you have the edit column visible, you can click the edit button for the specific Camera.

Alternatively, view the camera and then click Edit Camera button at the upper left.


This brings you to the Edit Camera page.

Make your changes and click Save to complete the process.
Adding / Managing Photos
Each Camera can have up to 4 photos.
Add
To add a photo:
Drag & Drop a photo over an empty placeholder.
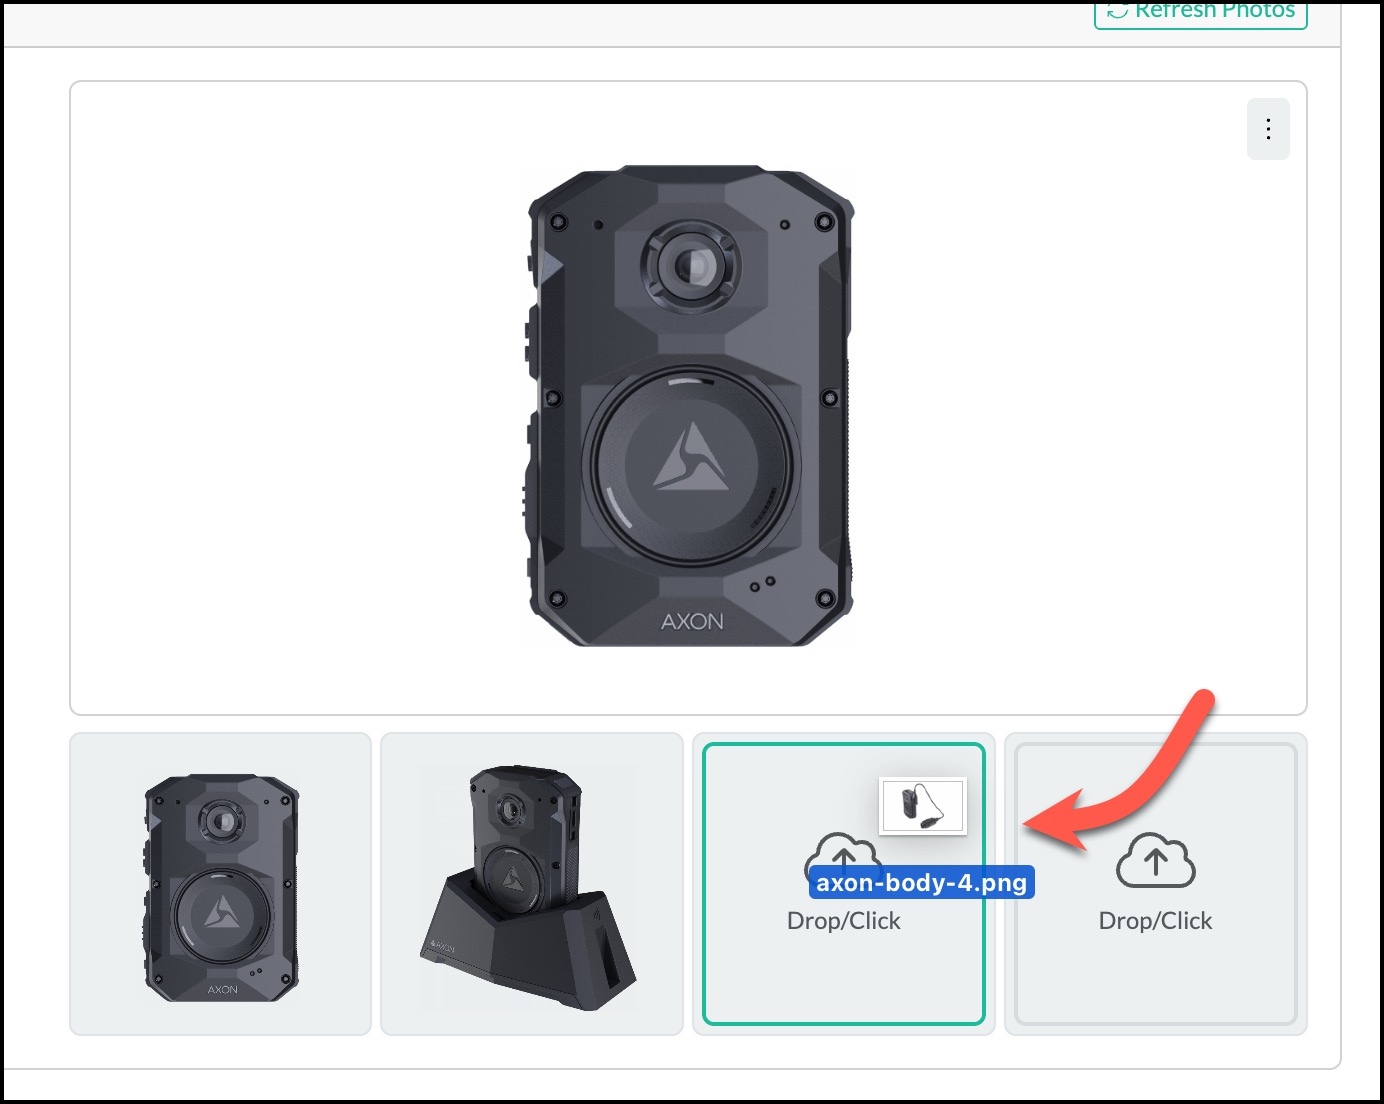
The photo uploads automatically.
Manage
To Manage a photo, make sure its the main photo displayed, then click the elipses at the top right corner of the image.
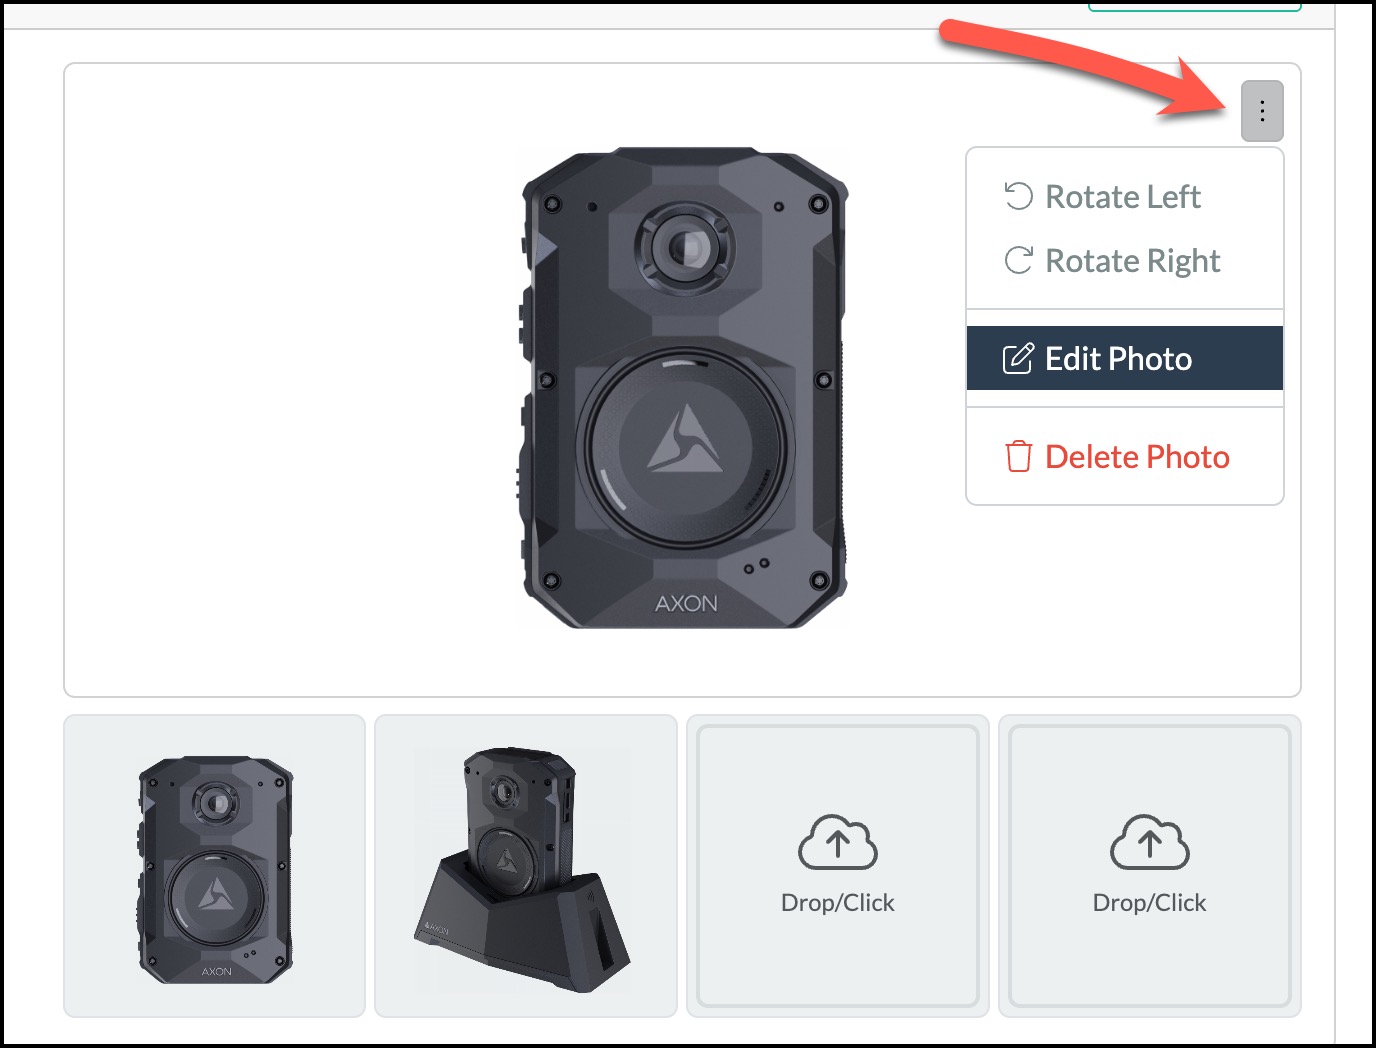
You can rotate, edit or delete a photo.
Adding / Updating Barcode (Check-in/out Module Only)
If your agency uses the check-in/out module, you can manage a camera barcode from the Edit Camera details page.

If the Camera has already been assigned a barcode, you will see the existing barcode and an Edit Barcode button.

if the camera does not have a barcode, there will be an Add Barcode button.

Add New Barcode
To add a new barcode, click the add barcode button.
A window will popup allowing you to add a new barcode to this item.

Click Add Barcode to complete the process.
if you have not done so already, do not forget to also set the item as available for use in checkout.

Edit Existing Barcode
To edit an existing barcode, click the edit barcode button.
A window will popup allowing you to edit the existing barcode.

There are two options you can select both of which are explained on the modal.
Click Edit Barcode to complete the process.
Reports
If you have the Reports-Camera permission you will be able to vier the camera reports.
Navigate to Reports => Cameras to view the available reports.
