
Creating Work Orders
New => Work Order
The PSTracker Work Order System was designed to quickly and easily document issues.
Work Orders
Work Orders should be created when you need to report an issues with an item tracked within PSTracker. To create a work order, click New => Work Order

Two Types of Work Orders
There are two types of work orders you can create.
-
- A vehicle associated work order. (A Specific Vehicle)
- An asset associated work order. (Equipment, Taser, AED, Firearm, Jail, Building...)
It's important to note a distinction between automated vehicle inspection generated work orders and work orders employees manually create using the new work order form. The vehicle inspection process will automatically create work orders for any items you uncheck and provide a note on. Because of this, if you just completed a vehicle inspection leaving one or more items unchecked, it is NOT necessary to also create work orders for those same issues.
Vehicle Associated Work Orders
The first tab available on the new work order page is Vehicles. This type of work order is designed to report a general issue on a specific vehicle. You will notice that the available types are consistent with the sections you see every day in your vehicle inspections. A work order created under the vehicle tab will be forwarded to the person responsible for the section you select. For example, if your check engine light comes on, select Engine/Drivetrain and your work order will be forwarded to the appropriate responsible person.
Other Work Orders
The remaining tabs are specific Modules. This type or work order is designed to report an issue on a specific item such as a piece of Equipment, Firearm, Taser, AED, Building or Jail. Clicking on the appropriate tab will reveal a work order form with a drop-down list of assets you can select. Select the specific item and complete the work order.
Creating Work Orders
In this example we will create a work order for an issue with our firearm.
From the main navigation menu choose New => Work Order
Select the appropriate tab (vehicle or other module)

Fill in the requested information.
For convenience the date and time are pre-populated with the current date & time.
Enter a description of the issue in the narrative.
If you are creating a vehicle work order and your agency allows, you may also take a vehicle out of service form this screen.
When ready, click the Review Work Order & Add Photos Button.
You are taken to a new screen where you may add files & photos to the Work Order.

Adding files & photos is optional and is NOT required.
To add a file or photo, drag & drop the files or photos into the dropbox area on the page, alternatively click the area and use your file browser to locate your file or photo to add.

The screen will refresh and you will see the newly added files and photos.

If the images do not appear or one or more are missing, click the refresh files button at the top right of the screen.

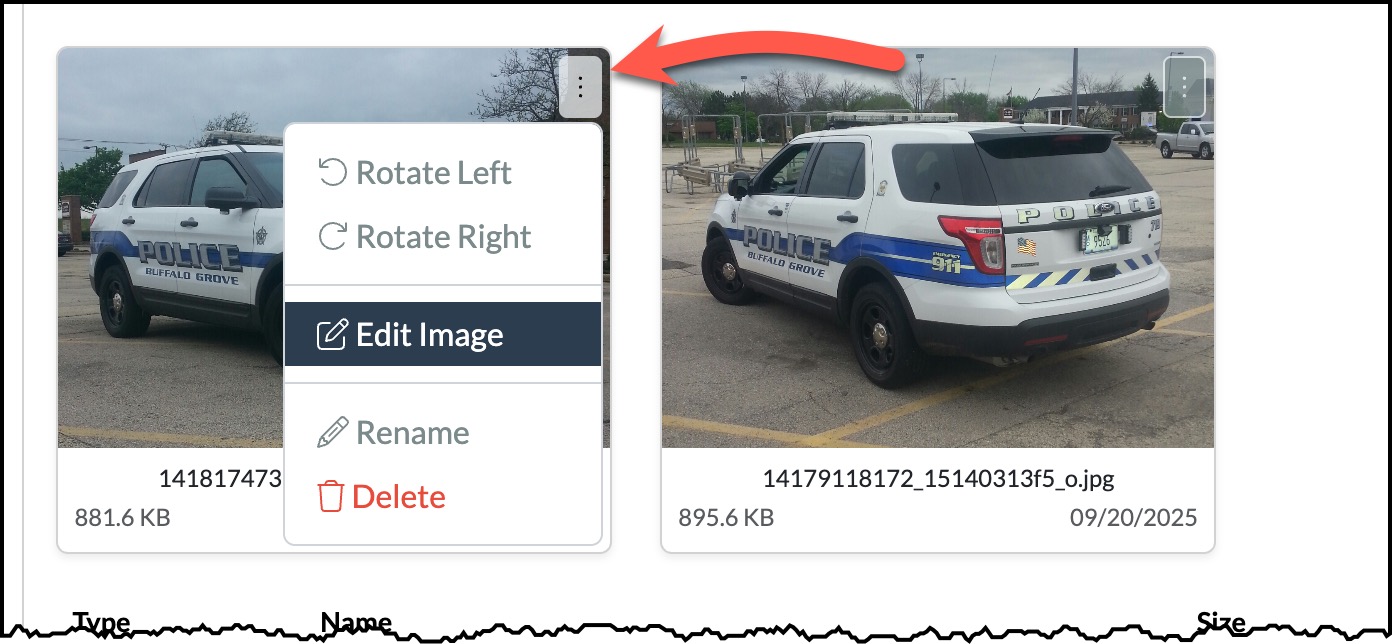
If you need to rotate, edit, or remove a photo. click the right corner of the photo and select an action.
if you need to delete the work order, click the Delete button at the top right of the screen.

If you need to rename or remove a file, us the buttons in that files row.

You have three options at this point in the process
- Create Work Order - Click Create Work Order to complete the process.
- Edit Work Order - Click Edit Work Order to modify one of the fields in the work order.
- Save & Edit - Click Save & Exit to save the Work Order as is, so you can come back and finish the Work Order at a later time. A Work Order that has been Saved will be visible on your dashboard until it is opened again and the user clicks Create Work Order.
Click Create Work Order to finish creating this work order.
Depending on your agency's settings emails go out to the proper personnel.

To search for an existing Work Order, see our article (link below) on Searching & Viewing Existing Work Orders.