
Creating Events
New => Event & View => Events
Events are designed to quickly and easily document and locate issues about a vehicle, such as scratches, dents, dings or damage.
- Each event may have up to four photos to help explain the issue being reported.
- Events are created by Supervisors, however each agency determines who can create events.
- Events may be edited if you have the proper permissions.
Event Menu Options
There are two menu options for Events; New => Event and View => Events.
- New => Event: Used to create a new Event
- View => Events: Used to search for and view existing events
Creating a New Event
New Event To create a new Event, from the main navigation menu choose New => New Event.

Complete the event entry by filling out the form.

If your agency uses work orders, you may also select to create a work order about this event.
When ready, click the Review Event & Add Photos Button.
You are taken to a new screen where you may add files & photos to the Event.
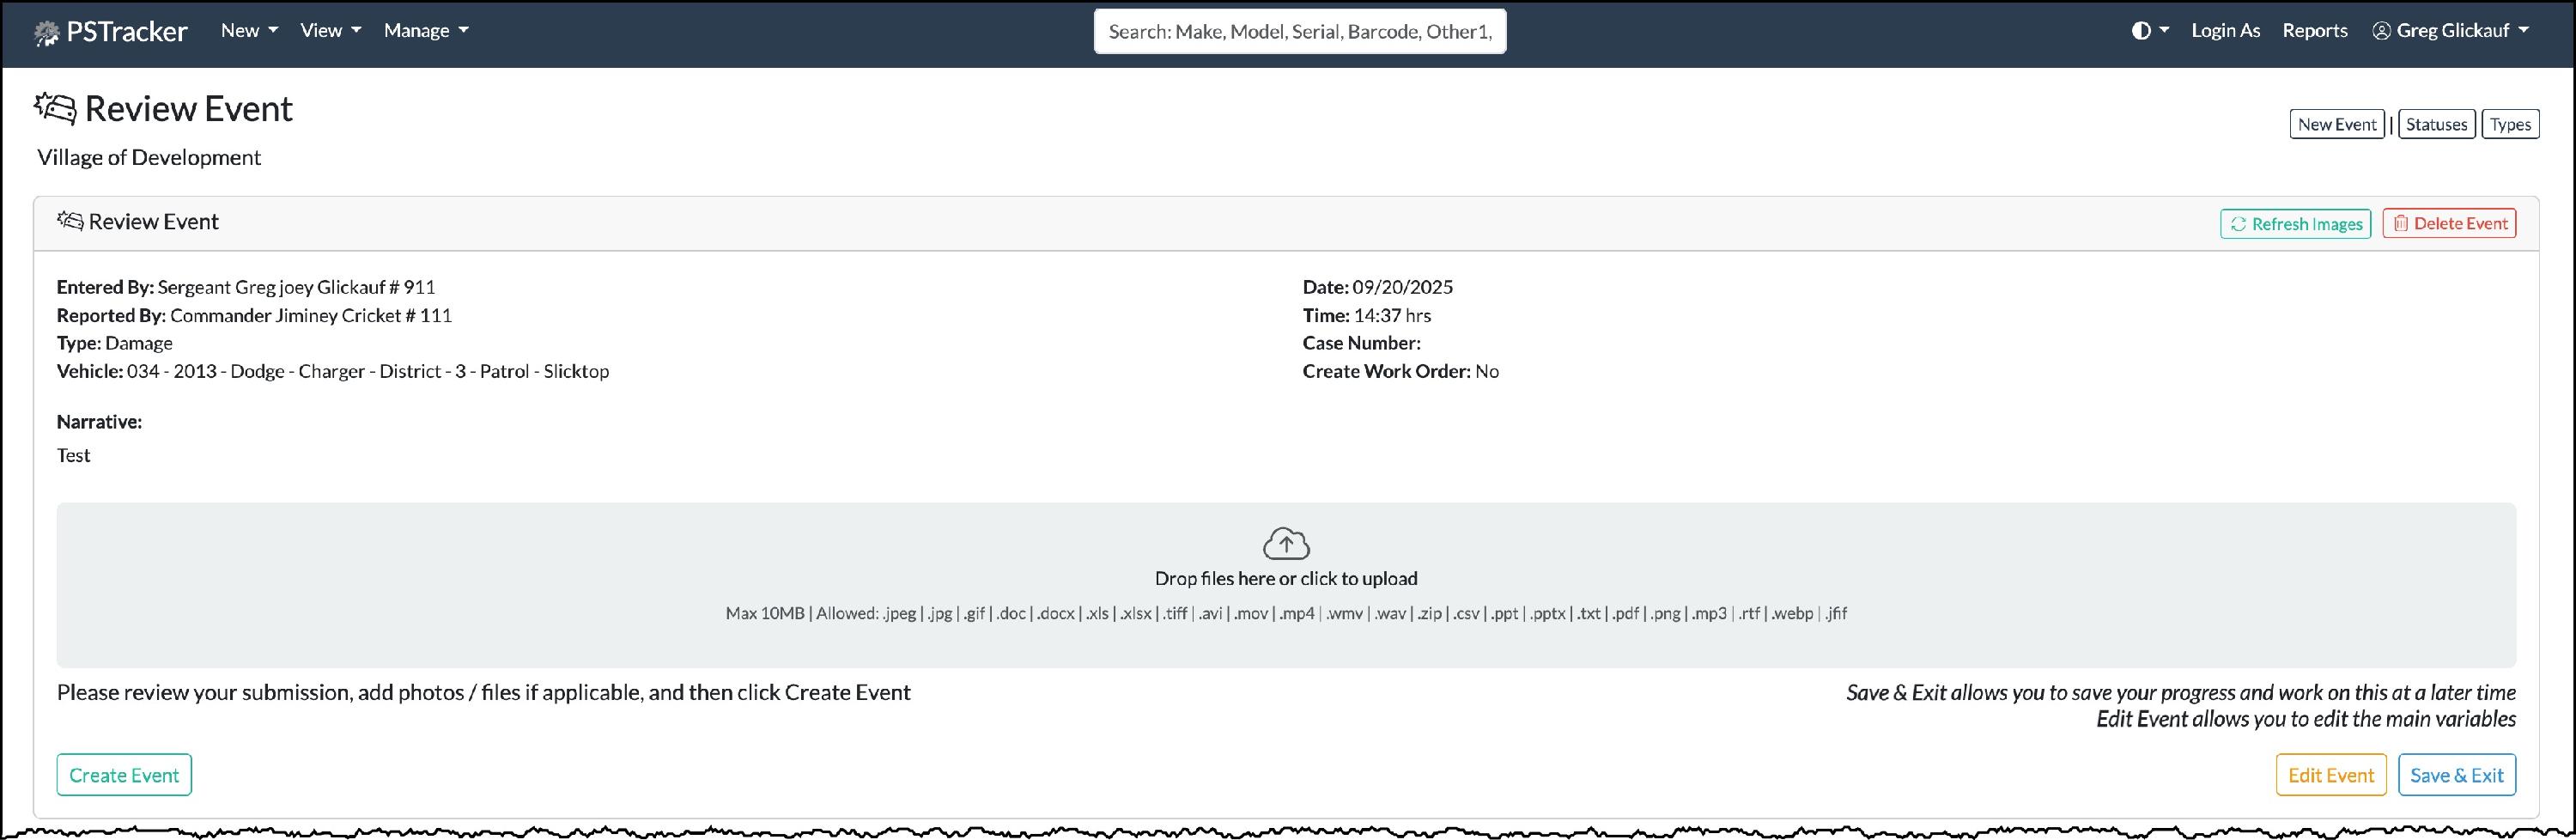
Adding files & photos is optional and is NOT required.
To add a file or photo, drag & drop the files or photos into the dropbox area on the page, alternatively click the area and use your file browser to locate your file or photo to add.

The screen will refresh and you will see the newly added files and photos.
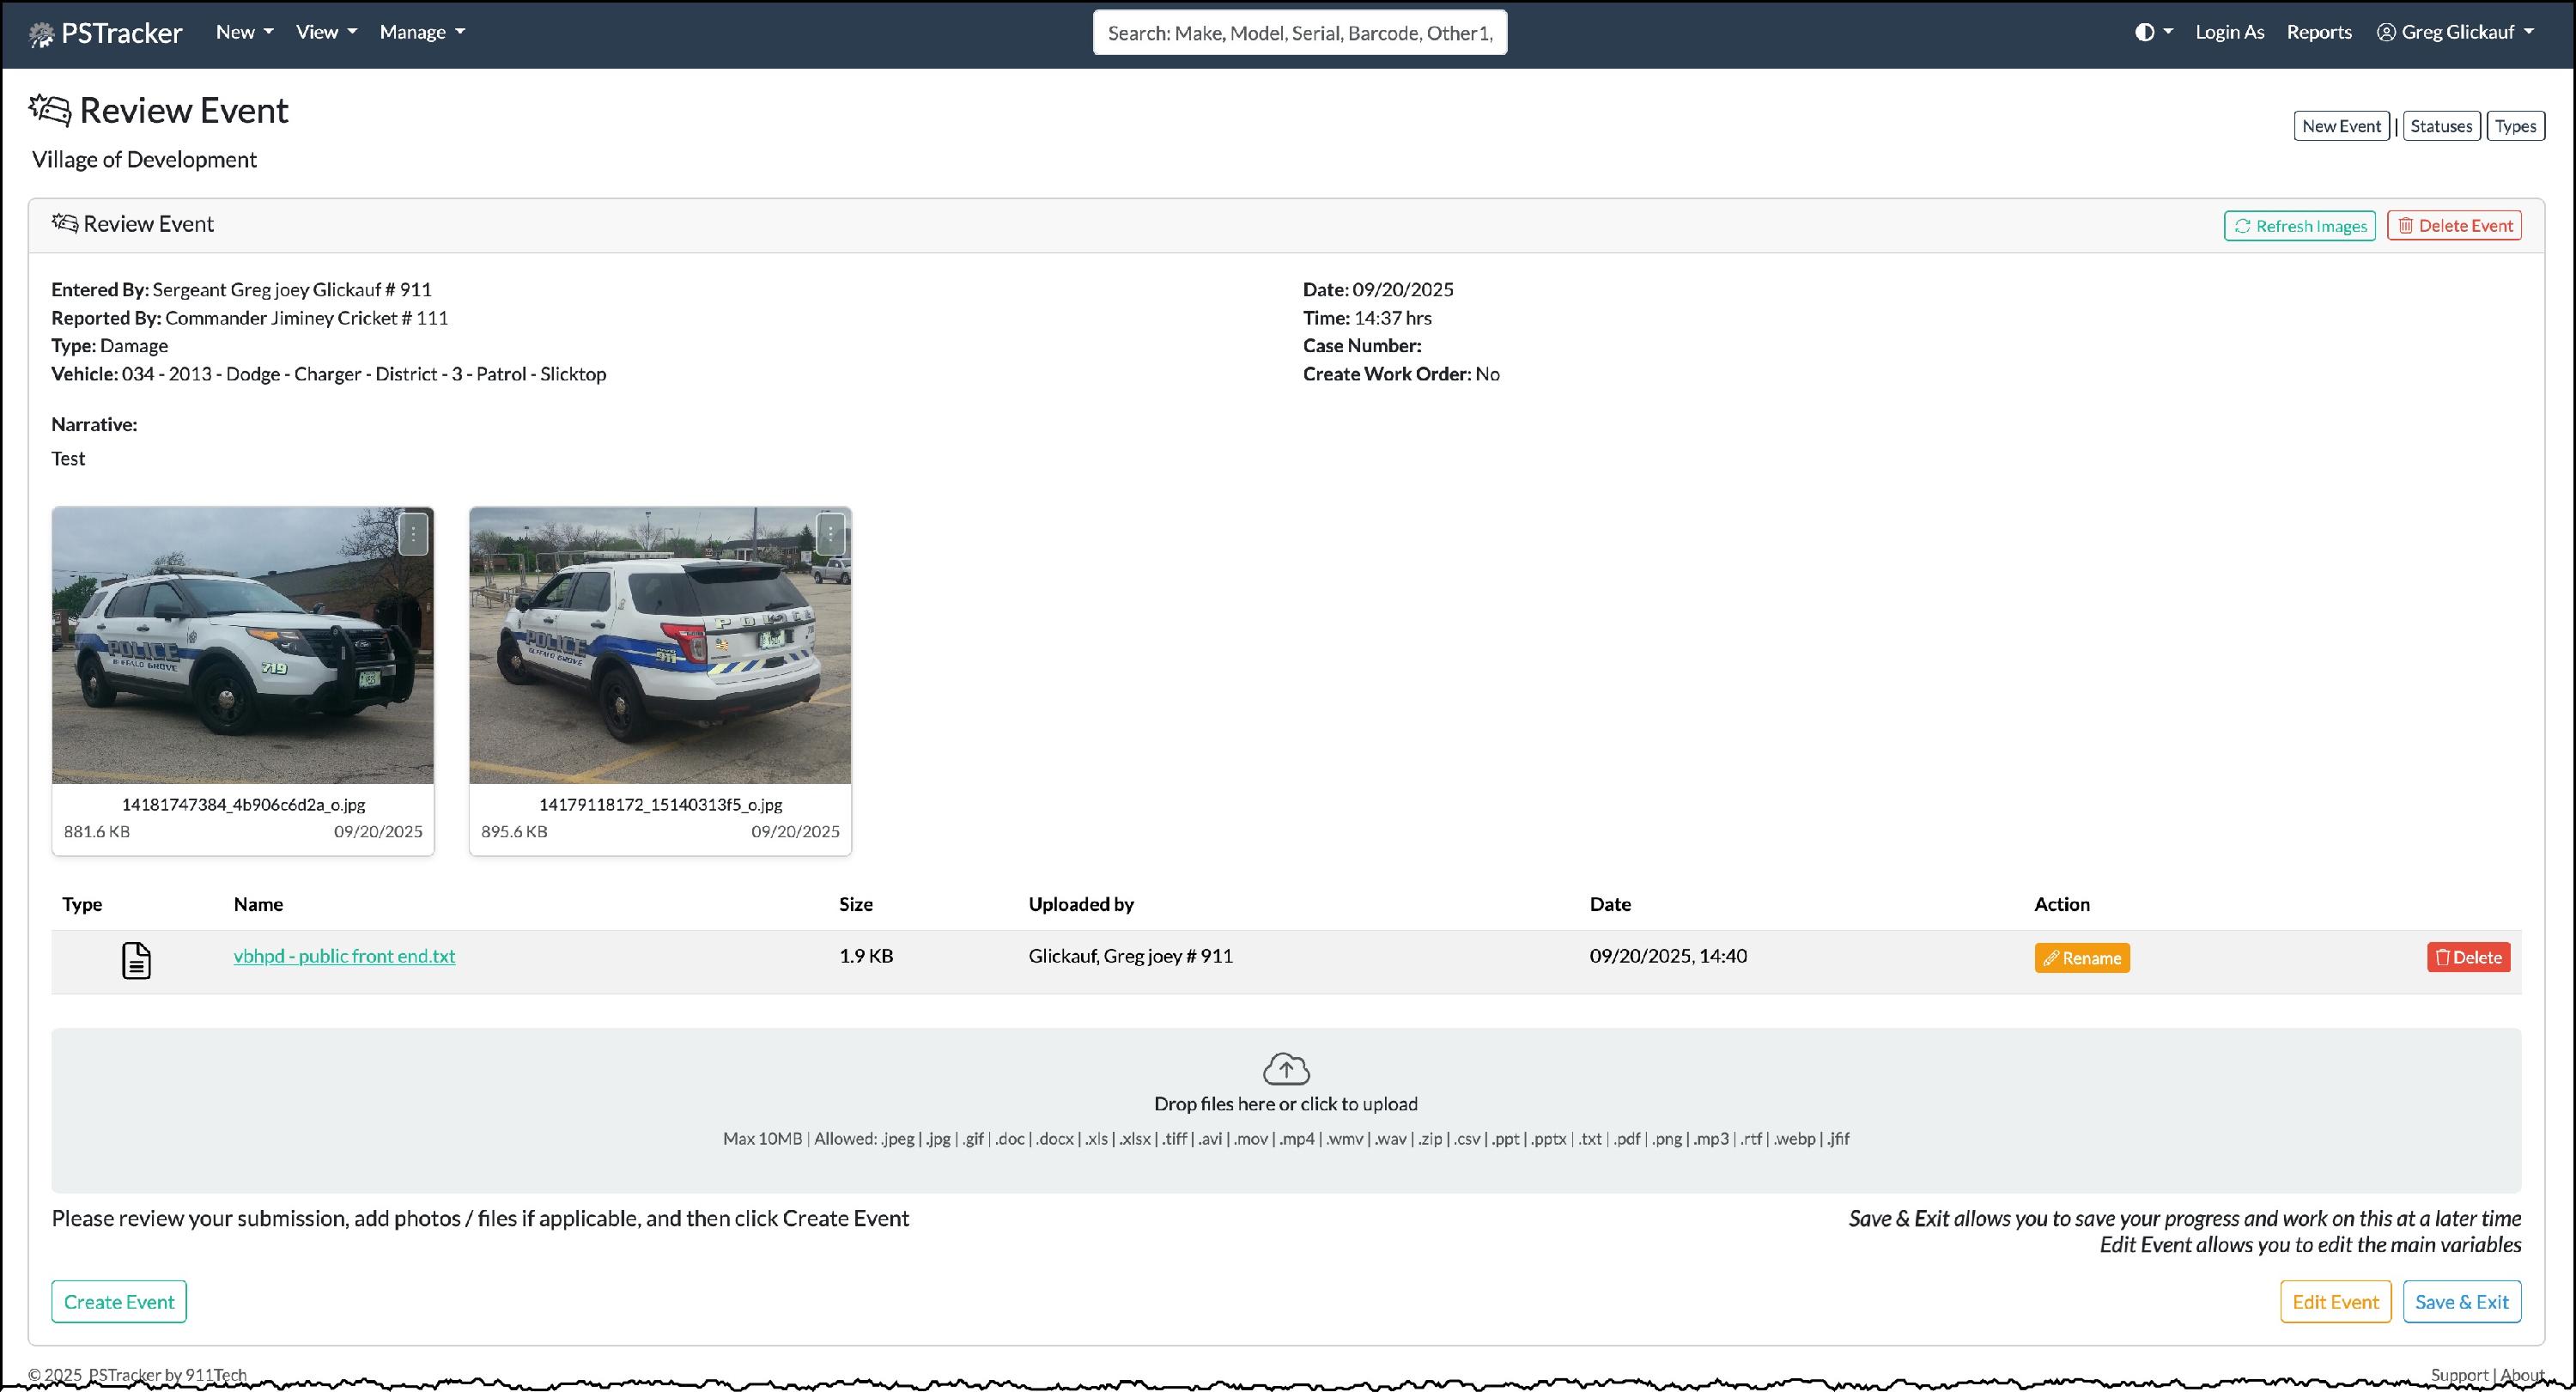
If the images do not appear or one or more are missing, click the refresh files button at the top right of the screen.

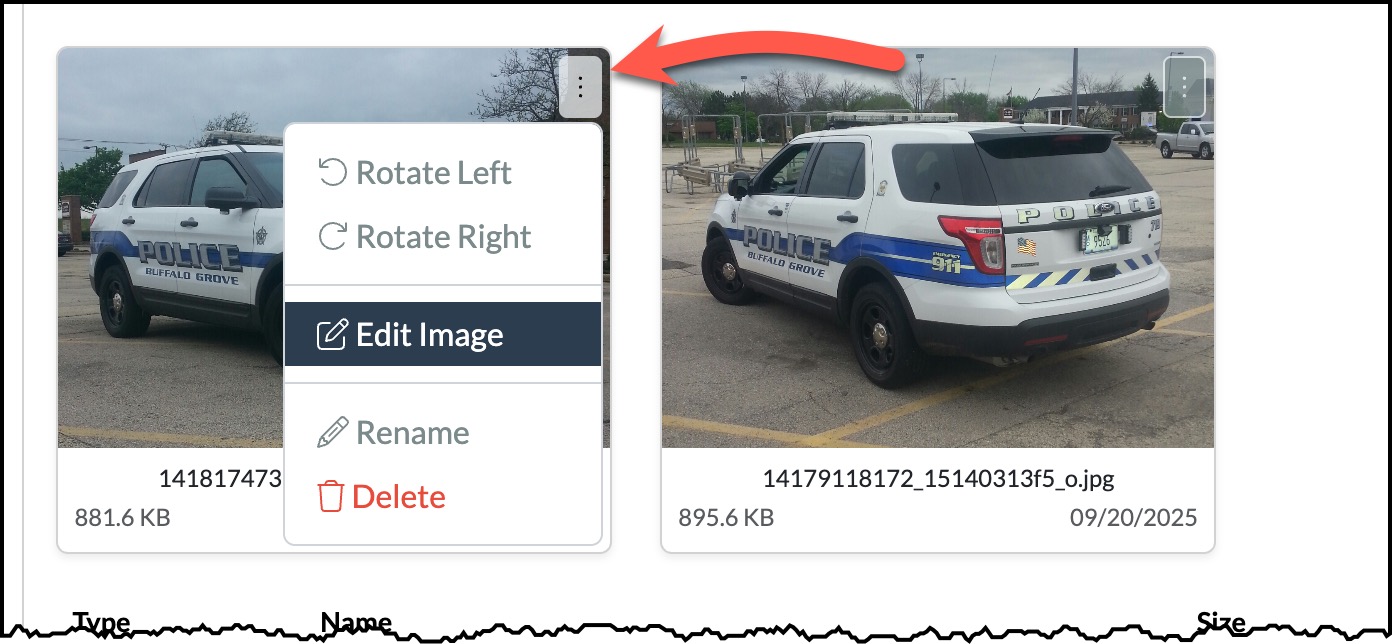
If you need to rotate, edit, or remove a photo. click the right corner of the photo and select an action.
if you need to delete the Event, click the Delete button at the top right of the screen.

If you need to rename or remove a file, use the buttons in that files row.

You have three options at this point in the process
- Create Event - Click Create Event to complete the event creation process.
- Edit Event - Click Edit Event to modify one of the fields in the event.
- Save & Edit - Click Save & Exit to save the event as is, so you can come back and finish the event at a later time. An event that has been Saved will be visible on your dashboard until it is opened again and the user clicks Create Event.
Upon clicking Create Event, the screen will refresh and you will be shown your completed Event.

Depending on your agency's settings emails go out to the proper personnel.
